Get Gooey & Soft Peanut Butter Rice Krispie Treats Every Time
There are few treats that conjure up a sense of nostalgic delight quite like Rice Krispie Treats. That satisfying snap, crackle, and pop, enveloped in a sweet, sticky marshmallow embrace – it’s pure childhood magic. But what if we told you that magic could be elevated? Imagine those classic squares infused with the rich, nutty goodness of peanut butter, transforming them into a confection that’s not just good, but utterly irresistible. And not just any peanut butter version, but one that promises to be gloriously gooey and perfectly soft, bite after delicious bite. For many, the idea of adding peanut butter to this beloved cereal treat is a revelation. It takes a simple snack and turns it into something truly special, offering a delightful balance of sweet, salty, chewy, and crunchy. Perhaps, like a child who once mistook a plain rice cake for the real deal, you’re ready to discover the true potential of peanut butter rice crispy treats. Forget dry, crumbly, or overly hard versions; this guide is your definitive blueprint for achieving that coveted, melt-in-your-mouth texture every single time.The Secret to Irresistibly Gooey Peanut Butter Rice Krispie Treats
The quest for the perfect peanut butter rice krispie treats often ends in frustration: treats that are too hard, too sticky, or simply lack that delicate chewiness. The good news? The secret to achieving ultimate gooeyness and softness is less about magic and more about mastering a few key techniques. These aren't just minor tweaks; they are foundational principles that will transform your treats from good to absolutely divine.Here are the core pillars to ensure your treats stay perfectly soft and wonderfully chewy:
- Embrace Low Heat: This is arguably the most crucial step. When melting butter and marshmallows, resist the urge to crank up the heat. High heat can burn the butter, make the marshmallows seize up, and even crystallize the sugars, leading to a brittle, hard treat. A gentle, low heat allows everything to melt slowly and smoothly, creating a luscious, pliable base.
- Fresh Marshmallows are Key: While old marshmallows aren't unusable, fresh ones will melt more evenly and contribute to a softer overall texture. Mini marshmallows are often preferred as they melt faster and more consistently than their larger counterparts, reducing the risk of overcooking the mixture.
- Don't Over-Compact: Once the cereal mixture is transferred to your pan, the temptation is to press it down firmly to create uniform bars. Resist! Aggressive pressing compresses the cereal, pushing out air pockets and resulting in dense, hard treats. Instead, gently pat the mixture into place with a buttered hand or a piece of parchment paper, just enough to even it out.
- Quality Ingredients Matter: While simple, the ingredients you choose do make a difference. Good quality butter, fresh marshmallows, and your favorite creamy peanut butter will collectively contribute to a superior final product. For an even more indulgent twist, consider exploring how Peanut Butter Rice Krispies: The Ultimate Twist on a Classic Treat can elevate your snack game.
Mastering the Melt: A Step-by-Step Guide for Ultimate Softness
Once you understand the principles, executing them becomes second nature. Here’s a detailed walkthrough to ensure your peanut butter rice crispy treats are consistently soft, chewy, and bursting with flavor.- Prepare Your Pan: First, select your pan. For a classic batch, a 9x9-inch or 9x13-inch casserole dish works wonderfully (the latter will yield thinner bars). Line it with parchment paper, leaving an overhang on the sides for easy removal, or spray generously with nonstick cooking spray. This crucial step prevents sticking and makes cutting a breeze.
- Slowly Melt the Butter: In a large, heavy-bottomed saucepan or pot, melt butter over very low heat. This slow process prevents scorching, which can impart an unpleasant flavor. Once fully melted, maintain the low heat.
- Integrate Marshmallows and Peanut Butter: Add your mini marshmallows to the melted butter. Continue stirring gently until they begin to soften and melt into a gooey, ethereal cloud. Once they are mostly melted, it's time to introduce the star flavor: the peanut butter. Stir constantly at this point – the peanut butter needs to combine smoothly with the marshmallow without sticking to the bottom of the pan and burning. This step only takes a couple of minutes, resulting in a beautifully homogenous, creamy mixture.
- Off-Heat Flavor Boost: As soon as the mixture is smooth and fully combined, immediately remove the pan from the heat. Stir in a splash of vanilla extract. Adding vanilla off the heat preserves its delicate flavor, preventing it from evaporating or turning bitter.
- Combine with Cereal: Pour your crisp rice cereal into the warm marshmallow-peanut butter mixture. Using a sturdy spoon or spatula, stir gently but thoroughly until every flake is evenly coated. This step requires a bit of elbow grease as the mixture is wonderfully sticky, but ensure all cereal is covered to avoid dry pockets.
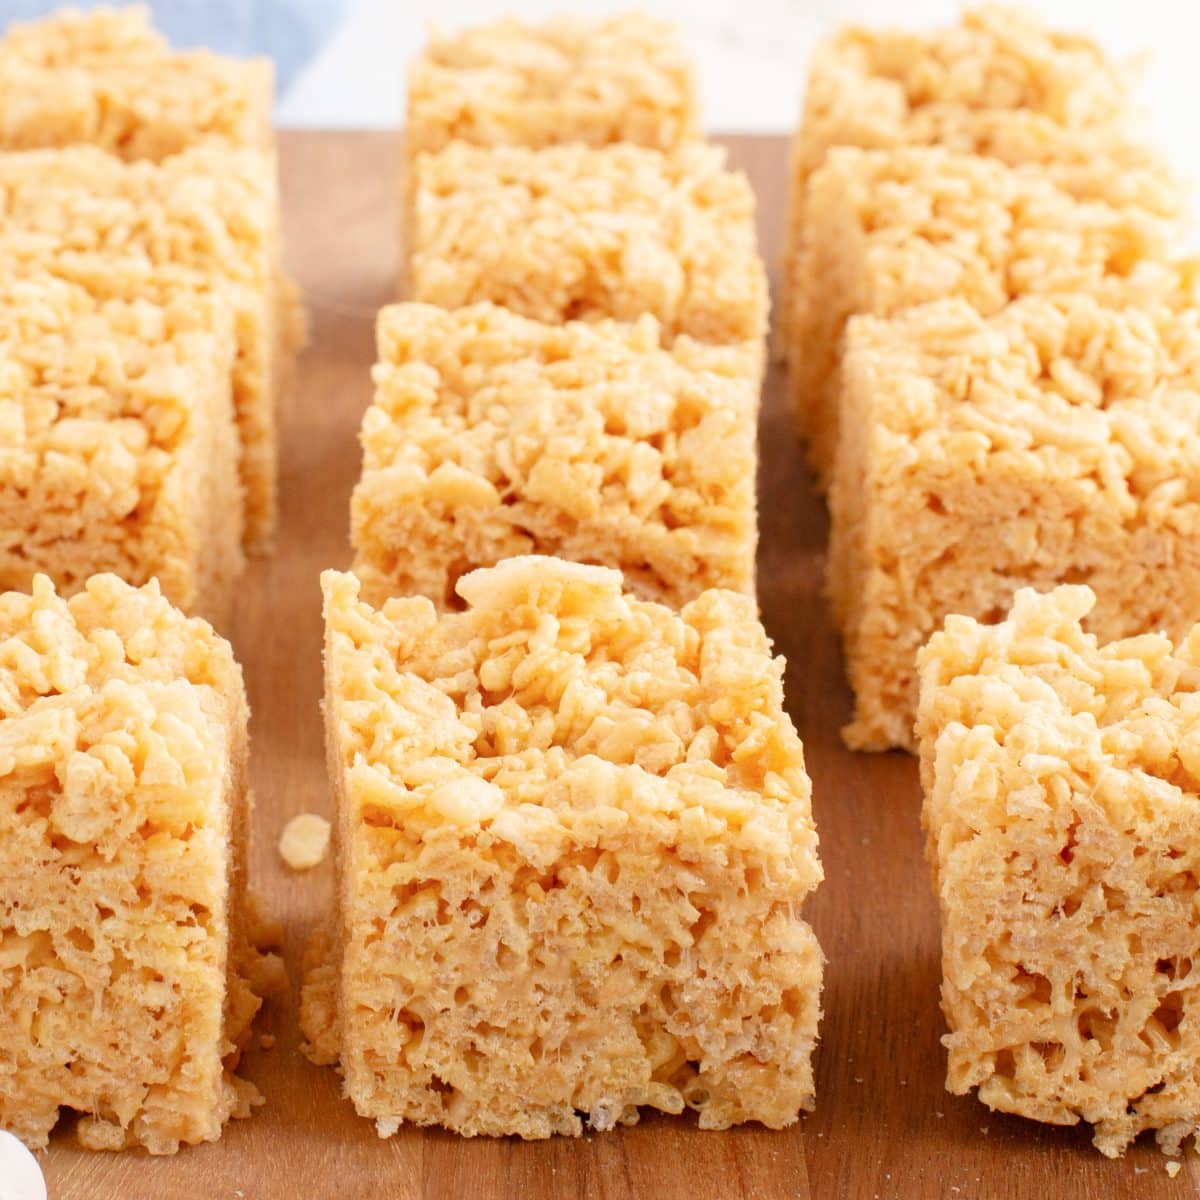
- Gentle Pressing for Perfect Texture: Transfer the coated cereal mixture into your prepared pan. To avoid dense, hard treats, lightly spray your hands with nonstick cooking spray or use a piece of buttered parchment paper. Gently pat the mixture down, just enough to spread it evenly into the corners of the pan. Remember, do not press hard.
- Allow to Set: Let your peanut butter rice krispie treats rest at room temperature for at least 30-45 minutes. This allows them to firm up slightly while retaining their beautiful chewiness. Once set, lift them out using the parchment paper overhang (if used) and slice them into bars.
Beyond the Basics: Tips for Perfecting Your Peanut Butter Rice Krispie Treats
Achieving soft, gooey peanut butter rice crispy treats is an art, and a few extra insights can elevate your masterpiece.- Peanut Butter Choice: Creamy peanut butter yields a smoother, more uniform texture. If you prefer a bit of crunch, you can experiment with crunchy peanut butter, but be aware it might slightly alter the overall "gooeyness." Natural peanut butter works, but ensure it's well-stirred to prevent oil separation.
- Avoiding Common Pitfalls:
- Burning: Always use low heat and constant stirring, especially when the peanut butter is added.
- Over-mixing: Once the cereal is in, mix only until combined. Over-mixing can break down the cereal and make the treats tougher.
- Stale Marshmallows: While they'll melt, stale marshmallows might not provide the same elasticity and softness.
- Storage for Lasting Softness: Store your peanut butter rice krispie treats in an airtight container at room temperature for up to 3-4 days. Avoid refrigeration, as it can cause them to harden. For longer storage, you can freeze them for up to 6 weeks. Thaw at room temperature before serving.
- Flavor Enhancements & Variations: Don't be afraid to get creative! A drizzle of melted chocolate or a sprinkle of mini chocolate chips can add an extra layer of decadence. A pinch of sea salt can further enhance the peanut butter flavor, creating a delightful sweet-and-salty contrast. Crushed pretzels folded in can introduce an exciting new texture.
